Whether you own a personal blog or run an e-commerce store, content plays a cornerstone in generating traffics and collecting revenues. However, apart from offering great content, it’s extremely important to remain your content evergreen.
To achieve that, you need to consistently manage, filter, and remove outdated or time-sensitive content from your site, which expires posts proves a smart idea.
While WordPress allows you to remove posts in just a heartbeat, it doesn’t include any built-in features to set post-expiration per your needs.
It’s time post expiration and protection plugins come in handy!
In this article, we’ll bring forward 2 approaches in expiring WordPress posts. The article will begin with an explanation on why you need to expire your posts, types of post-expiration, then guide you through the processes of expiring your posts via dates and passwords.
Let’s dive in!
- When You Need to Expire Posts in WordPress
- Types of Post Expiration
- Enable Custom Post Expiration by Protecting Pages and Posts
- How to Set Post Expiration Dates in WordPress
When You Need to Expire Posts in WordPress
Post expiration proves useful to time-sensitive content, such as promotions and private deals. Imagining that you offer coupons, discounts, giveaways, etc. within 3 days, customers would be confused if they still bump into these offers after the given time.
What’s more, similar to product restriction in e-commerce, post-expiration contributes to triggering user interest by creating an artificial shortage. Setting an expiration date will add a degree of urgency to your posts. If customers don’t take action soon, they will miss out on the big deal or the last chance to hunt their favorite items.
Plus, it’s necessary to apply post expiration to some seasonal content. For example, content about Christmas or Thanksgiving will be soon less relevant. Keeping them active may cause your site to be cluttered up and lose focus.
The common question is “Can I just delete these posts manually?”
The answer is always YES, definitely! However, it’ll take you a tremendous amount of time and effort! Think of running and managing an e-commerce store with hundreds of products. Manually removing deals/discounts on each product will waste your precious time! Instead, you can reserve your time and efforts to fully customize your online stores for the better!
Aside from that, another matter that should be considered is how quick and accurate you typically are. Will you ensure to remove the deals at 9 pm but not 9.01 pm?
As a result, leaving post expiration plugin handles this task makes your life much easier. With its built-in automatic and accurate timer, you’re free from forgetting and delaying having your posts expired.
Types of Post Expiration
Depending on your purposes, there are mainly 2 types of post-expiration that you can opt for: regular expiration and the custom one.
Regular expiration is the easiest and most popular way to expire posts in WordPress. It refers to how you simply define a specific date and time to get particular posts expired. In other words, you can’t add further customization on your expired posts and they’ll expire for everyone.
On the other hand, custom post-expiration allows you to set an expiration on various posts, on different dates and times, and to specific target users. This type of post-expiration is best suited for any users running a membership site, as they can freely expire and un-expire a distinct post via user roles.
Since you have a comprehensive overview of expiring posts in WordPress, in the next section, we’ll walk you through how to expire posts in WordPress via passwords and dates.
Enable Custom Post Expiration by Protecting Page and Post
This post expiry concept comes in handy when you wish to selectively expire posts for specific users. Or in other words, reserving other particular posts to target certain groups of clients.
Trusted by thousands of customers across the world, the Protect WordPress Page and Post (PPP) plugin is recognized as one of the most advanced plugins for securing your content. It is indeed a simple yet effective solution when it comes to custom post expiration.
When enabling your posts with PPP, you’re able to secure their original URLs and at the same time create protected URLs for your posts. This means that any users with the original and unprotected links can not access those pages. Instead, they will be redirected to a 404-not-found page.
What’s more, the plugin also supports you in expiring protected links. In other words, you can set a given time or a number of clicks for protected links after which they’ll automatically expire.
Assuming that you have PPP installed and activated, the process of setting custom post-expiration will take place based on 2 main stages:
- Shield the posts’ original URLs
- Grant access to your post via user roles
Shield Individual Post
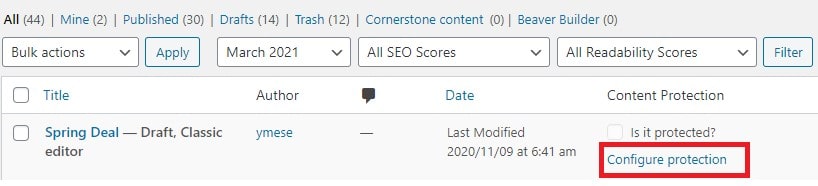
1. In your WordPress dashboard, go to “Posts” and you’ll see a newly added “Content Protection” column. Hover your desired post and click on “Configure protection“.
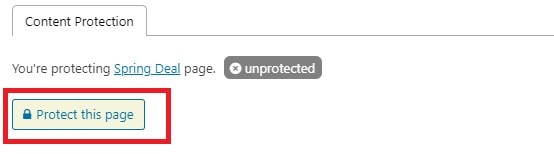
2. A new popup will show up. Simply hit “Protect this page” to protect your content.
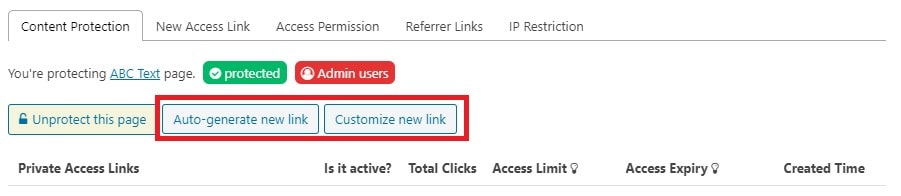
3. Auto-generate an access link or customize a new one.
4. Set access permissions for your protected links in the “Access Permission” tab. This will be explained in the next section.
Aside from that, the plugin lets you protect multiple WordPress posts at the same time with ease.
Protect Multiple Posts At Once
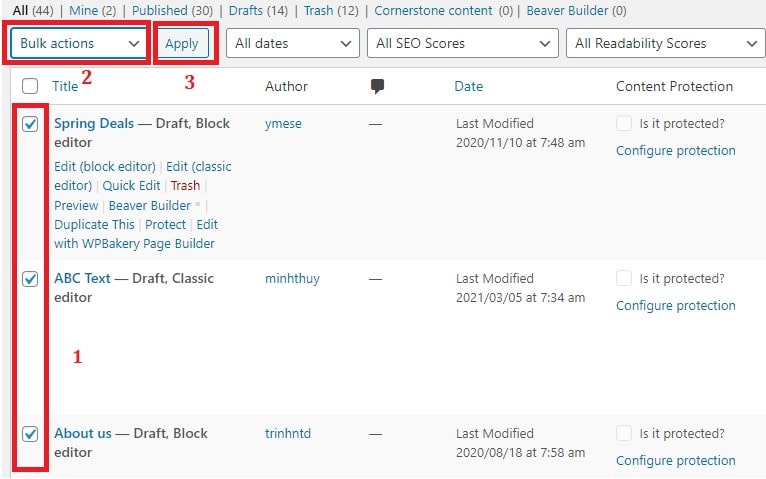
1. Go to “Pages” or “Posts” and choose which post you want to protect by ticking on the checkboxes.
2. In the “Bulk Action” option, choose “Apply for Protection” in the drop-down and click “Apply“. All the selected posts now will be protected.
Since you’ve protected your posts, it’s time to grant access to your target users.
Grant Access to Your Protected Posts via User Roles
Target customers with certain user roles can gain access to specific posts. You should set only logged-in users or some particular user role such as members, editors to be able to access these posts.
1. Go to Settings > Content Restrictions > Set Access Permission.
2. Select “Choose custom roles” in the drop-down.
3. An extra field shows up. Choose which user role to grant access in the dropdown.

That’s it! You’ve equipped yourself with how to custom-expire your posts using PPP Gold. This method works best for membership sites. In case you’re just a normal WordPress blogger and looking for a simpler solution on post-expiration, Post Expirator is a perfect choice.
How to Enable Post Expiration Date in WordPress
Receiving over 100,000 active installs on the WordPress plugin directory, Post Expirator wins the title of the most favored plugin for regular post-expiration. This free plugin offers an ideal solution to create expiration dates for posts.
The following tutorial will show 3 steps on how to create post expiration dates in WordPress:
Step 1: Define the Time Zone for Your Site
Step 2: Configure Settings
Step 3: Set Expiry Date for Your Posts
Step 1: Define the Time Zones for Your Site
The plugin will follow the time settings of your WordPress site, therefore, you need to set the website time zone before expiring any posts. The following guide will show you how to activate and define the time zones of your site:
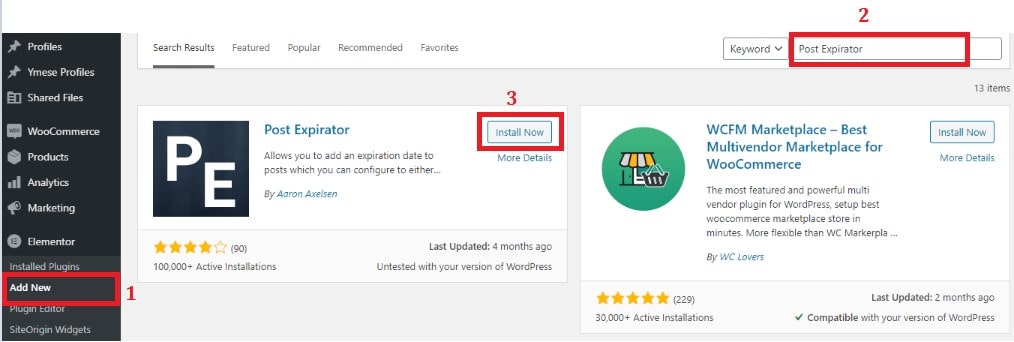
1. In your WordPress dashboard, go to “Plugins“, and click “Add New“.
2. Look for the Post Expirator plugin in the search bar, then click “Install Now“.
3. Click “Activate” to activate the plugin.
4. Head over to “Settings“, choose General > Time Zone.

Step 2: Configure Settings
Before expiring your post, you should configure its settings to adjust some items based on your needs and purposes, including post status after expiry dates, time format, and so on.
1. First, navigate to “Settings” and select “Post Expirator“.
2. Under “Post Expirator Options“, there are 4 tabs that you need to modify: General Settings, Defaults, Diagnostics and View Debug Log.
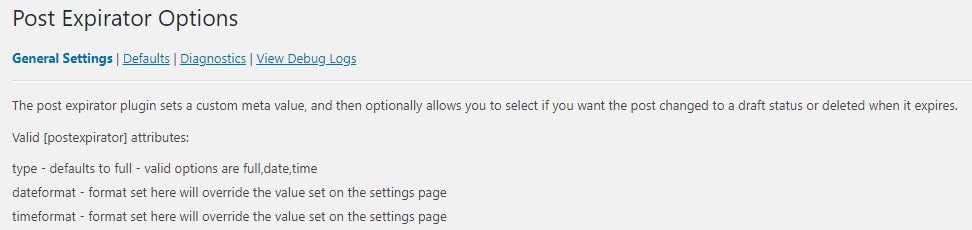
Let’s dive deeper into these tabs.
- General Settings
This tab contains 4 smaller entries: Defaults, Category Expiration, Expiration Email Notification, and Post Footer Display
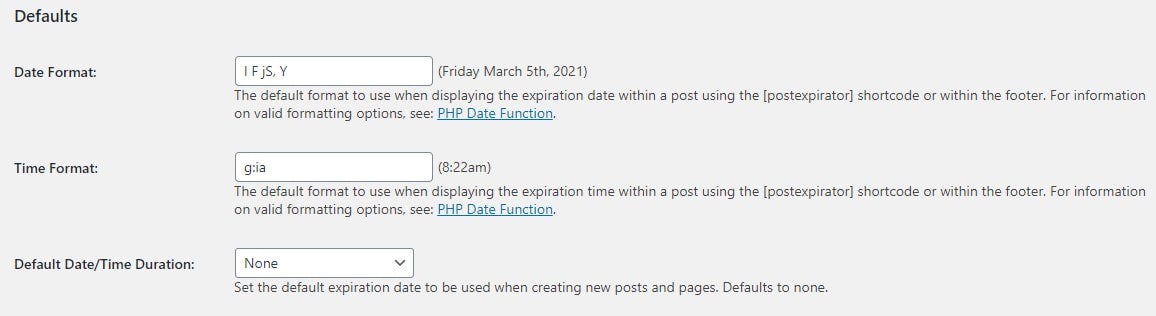
Defaults
- Date Format and Time Format: select your accustomed time format to easily manage your expiration dates.
- Default Date/Time Duration: set the expiration date, which we will explain clearer in the next step.
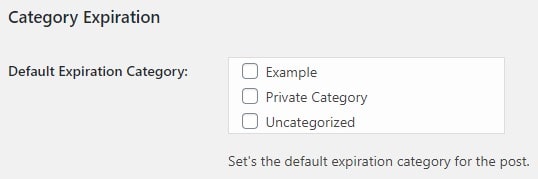
Category Expiration
Rather than removing posts, you can move them to other categories so that your users can find them again if needed. This is useful even for you in case you want to track and reuse them later for materials or references in the next events or promotional campaigns.
For instance, an expired giveaway post can be moved from the “Events for Loyal Customers” category to the “Expired Posts” one.
In Category Expiration, select a category that you want to move expired posts in. If not, you can leave this part empty.
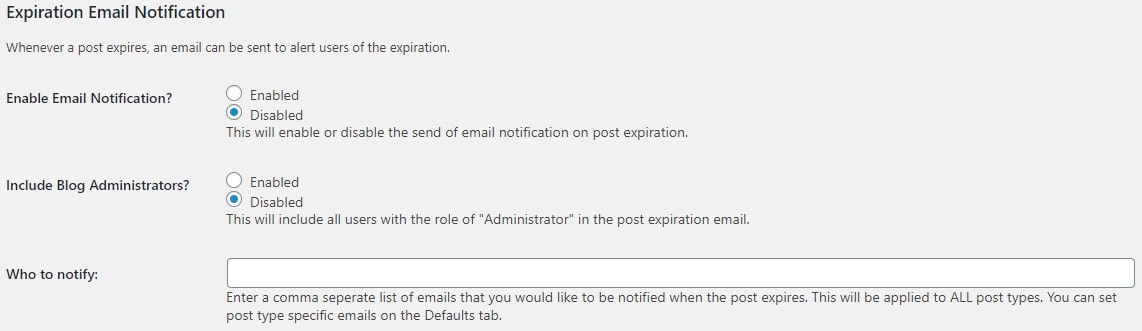
Expiration Email Notification
This feature allows you to set up expiration email notifications or reminders. You’ll be notified whenever the post expires, which helps you easily check and control the posts hidden. By ticking in the checkbox, you will Enable/Disable the notifications as well as choosing who will receive them.
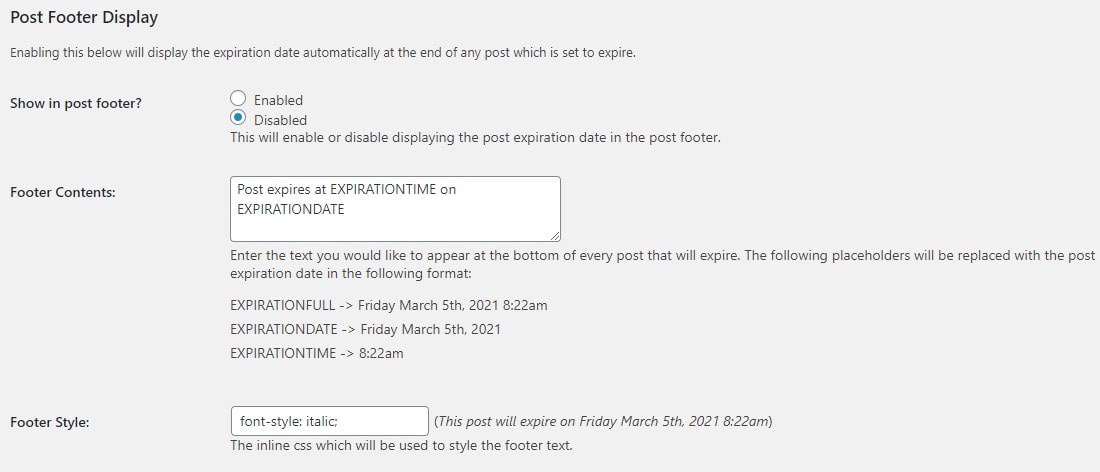
Post Footer Display
Normally, only you can see the expired date set in your posts. However, there are some cases that you’ll wish to display to users, i.e expiry date for candidates to submit their tests.
This feature enables you to include the message in the footer, along with detailed information about the year, month, and time.
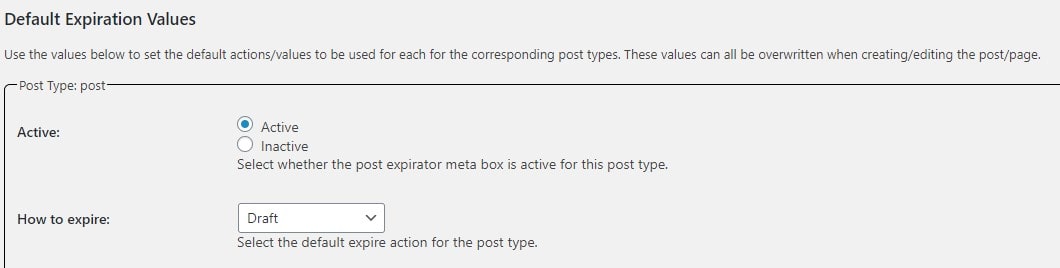
- Default Tabs
In the “Default Tabs” next to “General Settings”, you need to pay attention to the options in the “Post type: post“.
- Active: display a section on the sidebar, inside the post/page editor to set expiry dates. We recommend you leave this one active as default.
- How to expire: define the post status after expiration. We will reserve this one for the next part.
- Diagnostics and View Debug Log:
These two tabs provide configurations that assist you in diagnosing and fixing bugs. Skip this tab if you are a complete WordPress novice.
For now, that’s all the settings you need. Scroll down and click “Save Changes“.
Step 3: Set Expiry Date for Your Posts
Set Up a Default Expiration Dates for All Posts
1. Go back to “General Settings“.
2. In the “Default Date/Time Duration” option, choose “Custom“.
3. Fill your custom expiration dates in an extra field.
For example: if you want your posts to run out after 15 days, type “15 days” in that field.

After expiration, your post will automatically go back to the default status.
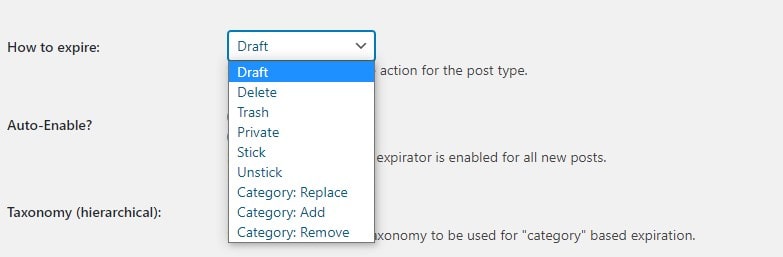
4. Switch to the “Defaults” tab, in the “How to expire” option, you can choose to delete, put them in the trash, set them private, pin them on top, or move them to other categories (Category: Replace) and so on.
Set Expiration Dates for Each Post
1. Go to “Posts” and open the post you want to set expiration dates after particular days.
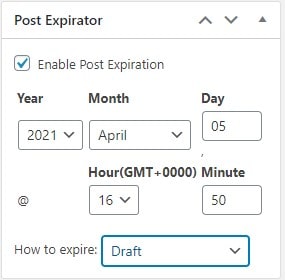
2. You’ll see the “Post Expirator” section on the sidebar on your right side. Tick on the “Enable Post Expirator” checkbox to activate the expiry date function.
3. Choose the exact date (year, month, date) that the post will be run out.
4. Finally, in the “How to expire” option, choose post status after expiration.
Ready to Expire Posts in WordPress?
There is nothing more disappointing than a buyer running into your outdated discount advertisement, then realizing it’s already expired after eagerly checking out your website. This is similar to playing with fire as it may result in a high chance your site will get 1-star reviews from customers.
To avoid this scenario, you should make use of post protection and expiration plugins to have your time-sensitive and seasonal content run out.
In general, the 2 plugins we recommended above share similarities in helping you to expire your posts in WordPress. The main differences arise from post-expiration styles and purposes.
While Post Expiator excels in adding regular date expiration to your posts, PPP takes custom post expiration to the next level by allowing you to selectively expire posts to specific users.
Related items
Developers across India are reporting serious Supabase access disruptions in India. Projec

The India U-19 vs Bangladesh U-19 cricket match is more than just a youth-level game. It r
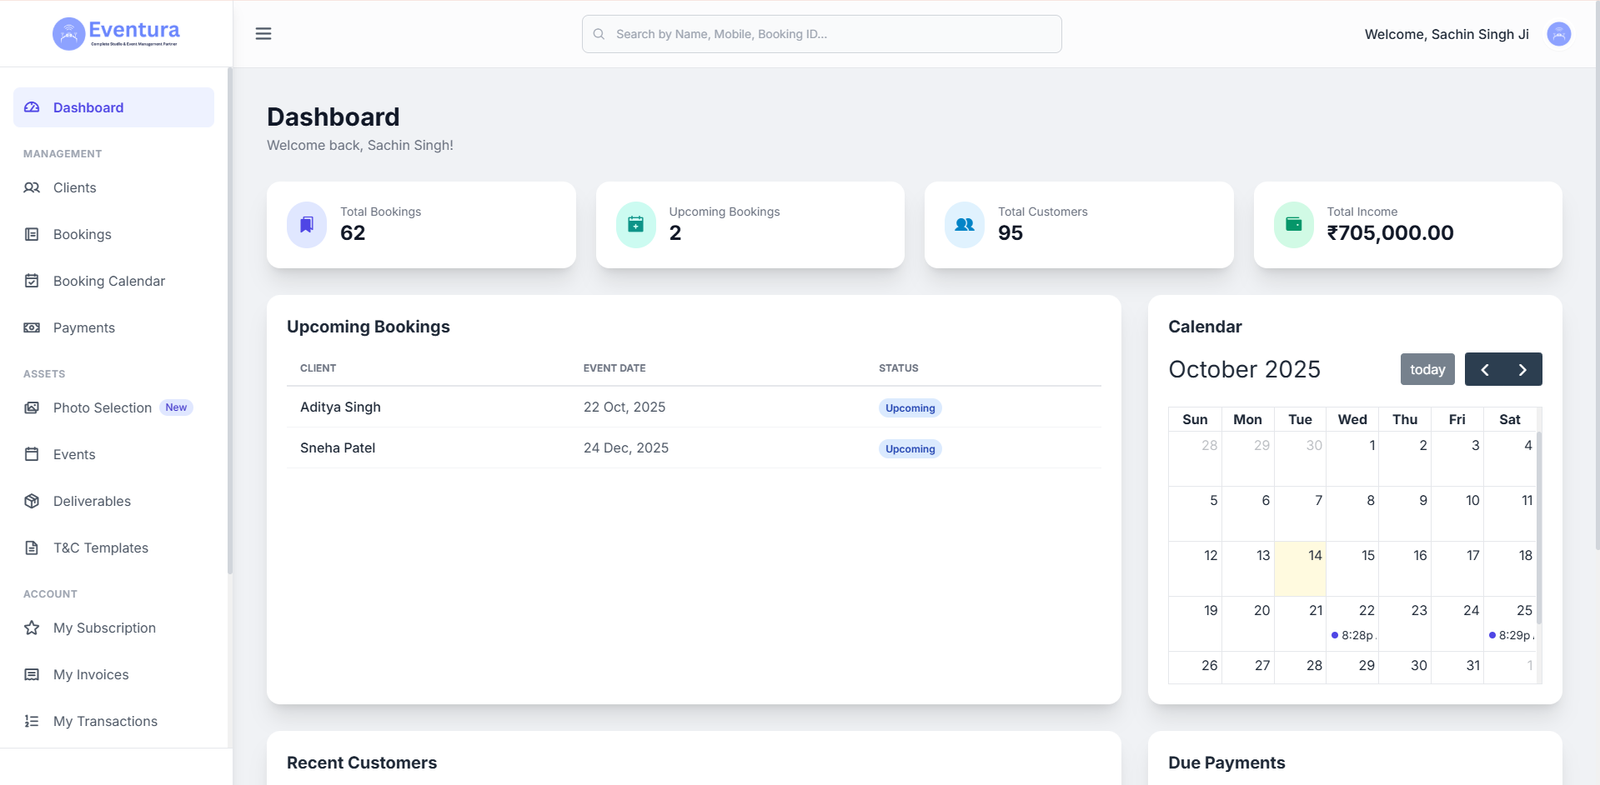
Are You a Photographer Drowning in Paperwork? Here’s How to Fix It. If you’re a pho