Do you know about WordPress Multisite?
WordPress Multisite (or WordPress MultiUser/WPMU) is a WordPress feature that enables you to run multiple WordPress sites from within one WordPress installation.
All these installations contribute to ‘network’. Though the sites in this network share one database, they have separate tables within this database and different directories for media uploads. Additionally, the same plugins and themes are shared by the sites in the network.
Only the Network Admin can manage plugins and themes for all sites from one single Admin Dashboard.
Pros and Cons of WPMU
WordPress Multisite has its advantages and disadvantages.
The pros of WPMU:
- It can manage multiple WordPress blogs from a single dashboard.
- You can install WordPress blogs inside the network with one-click installation (just enter the blog name and Admin email address).
- You can have multiple sites/blogs for the same admin/user that will have the ability to manage these sites from the same dashboard.
- Super Admin can access all the blogs and can manage them.
- When it comes to updating WordPress, a plugin or theme version needs to updated only once for all the sites within the network.
- A Super Admin can even manage privacy settings and decide what options or features the users will have access to.
The cons of WPMU:
- The Super Admin should know about managing WordPress blogs and also about editing WordPress core files on the server.
- It is possible that some themes and plugins designed for a regular WordPress website won’t work properly for WMPU, so it is necessary to find alternatives.
- If the main installation gets affected or hacked, then all the blogs in the network will be affected/hacked too.
Steps to Configure WordPress Multisite
Here is checklist of action items you should take prior to installing WordPress Multisite:
1. Ensure that WordPress is already installed and running on your website. The One-Click install option in your panel is the best way to install WordPress.
2. Take your website backup prior to making any changes. Ensure that you backup both your web server files along with your database.
3. Check your current Permalinks and ensure they are functioning correctly.
4. Deactivate all plugins.
5. Open your wp-config.php file, and add the following line above /* That’s all, stop editing! Happy blogging. */.
/* Multisite */
define( 'WP_ALLOW_MULTISITE', true );
Installing WordPress
1. Log in to your WordPress site.
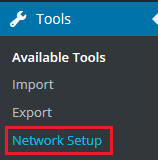
2. On your left menu, go to Tools category.
3. Under that click on Network Setup.
4. Select either subdomains or subdirectories.
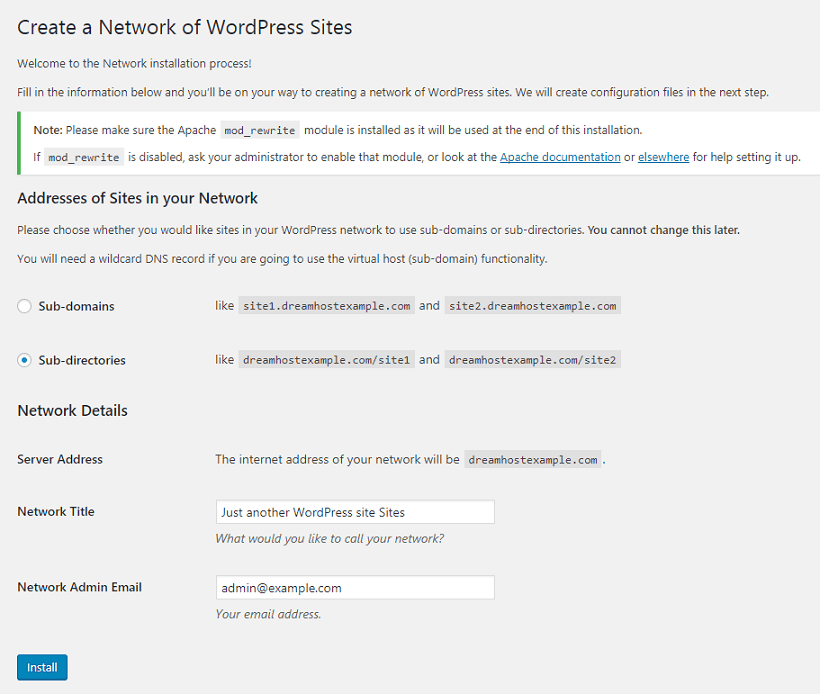
5. Check if all details are correct, and then click the Install button.
You will see wp-config.php and .htaccess instructions on this page:
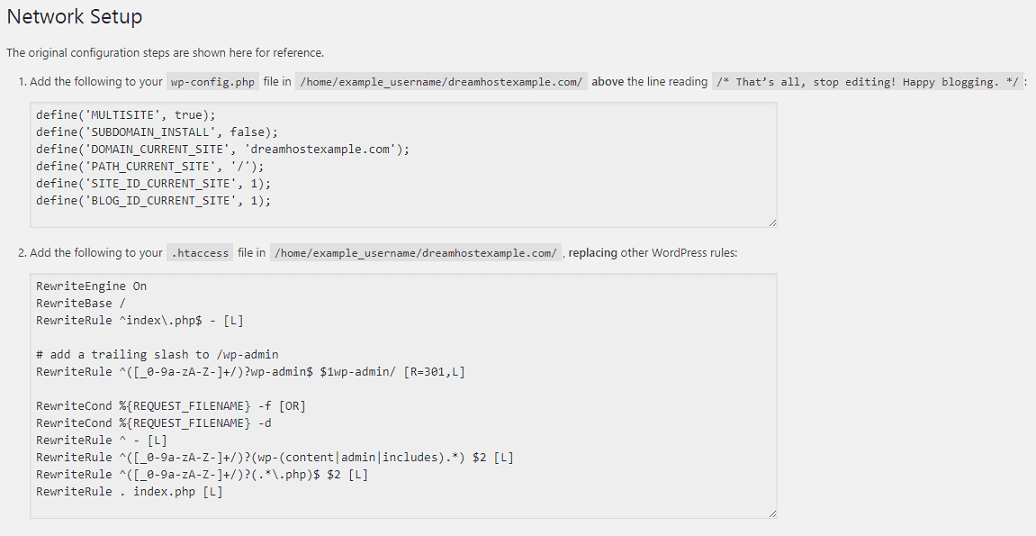
6. Include the lines into your wp-config.php and .htaccess files.
- Copy any current data in your .htaccess file.
7. At the bottom of the page, click the ‘Log in’ link to log into your new Multisite installation.
Now, the ‘My Sites’ menu will appear on the top left of your dashboard:
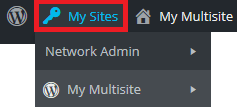
8. After clicking on ‘My Sites’, the following drop-down submenus will appear:
- Network Admin (For network administration)
- My Multisite (The original site name)
In this way, you can now configure WordPress Multisite.
Related items
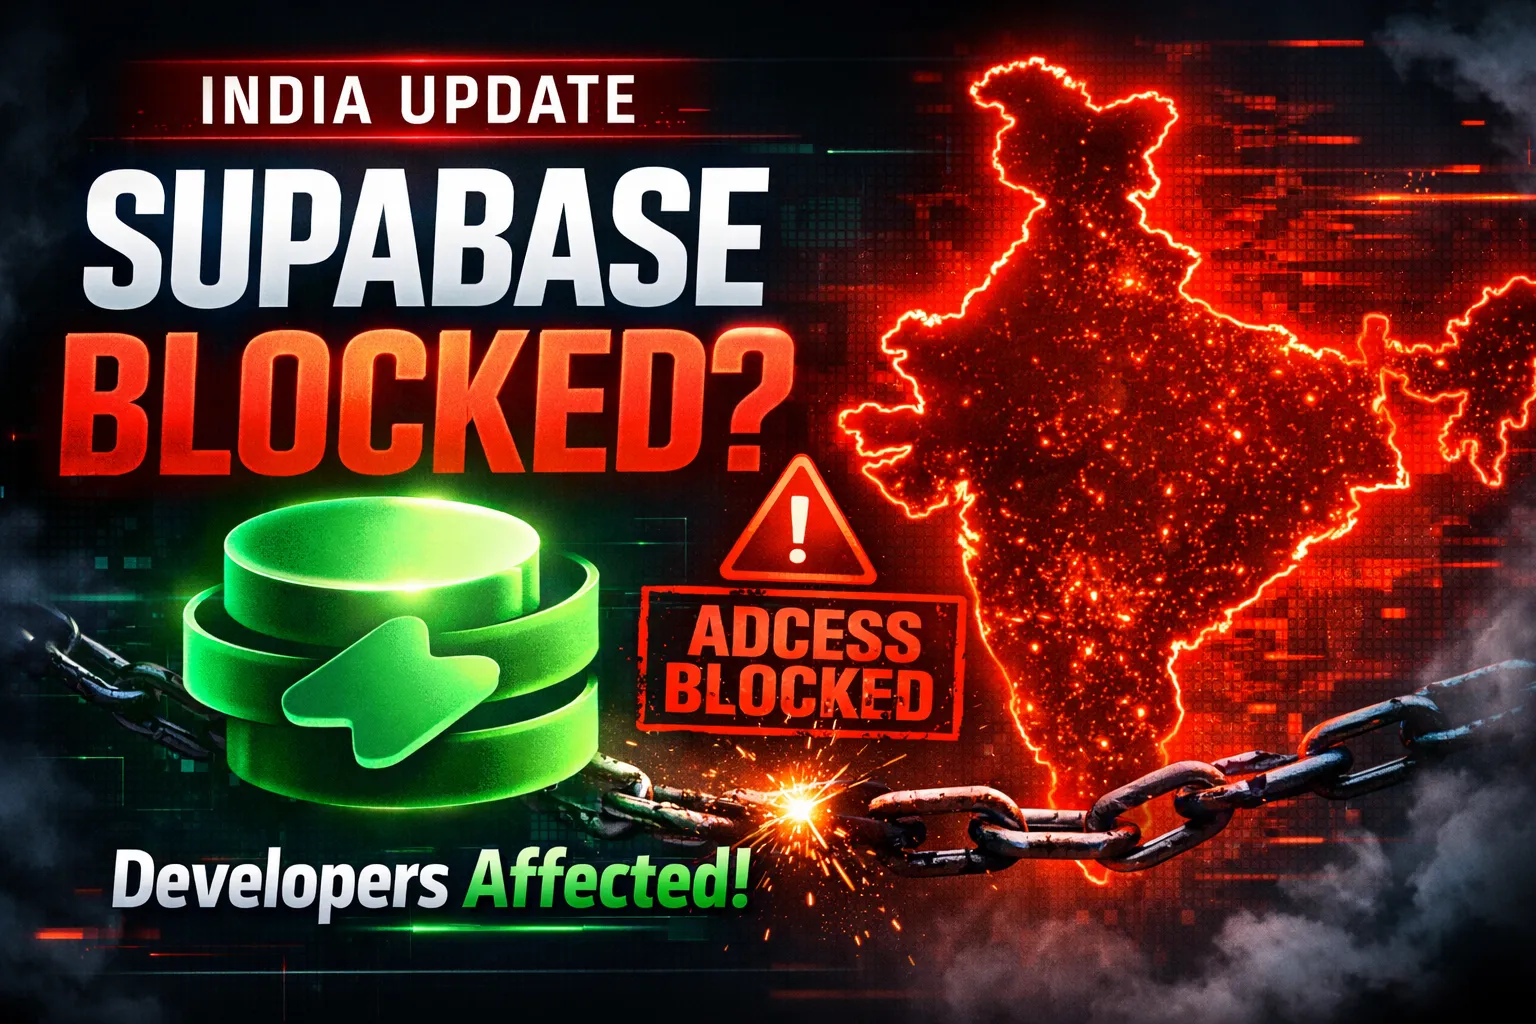
Developers across India are reporting serious Supabase access disruptions in India. Projec

The India U-19 vs Bangladesh U-19 cricket match is more than just a youth-level game. It r
Are You a Photographer Drowning in Paperwork? Here’s How to Fix It. If you’re a pho